Shrewsbury Agricultural & Professional
Mercian House,
9 Darwin Court, Oxon Business Park, Shrewsbury, SY3 5AL
Oswestry Agricultural & Professional
The Estates Office,
23 Church Street, Oswestry, SY11 2SU
DIY Christmas wreath
30th November 2021
Its that wonderful time of year where we adorn our homes with foliage, tinsel and all manner of Christmas goodies. Traditional or tacky (I am in favour of the tacky!) we love to decorate at Christmas, but why not give it a go yourself.
I have noticed that there are more and more wreath making classes that offer a great night out with friends, food and drink starting from around £60.00. If your budget doesn’t allow for this then don’t worry, you can get creative and make your own beautiful wreath for virtually no cost.
We decided to do just that!
Shopping list:
- Your wreath ring. We used a moss wreath that was brought from Ebay for £13.99 for a pack of two. This was our only expense. You can also buy metal, polystyrene or plastic rings from any craft store or website
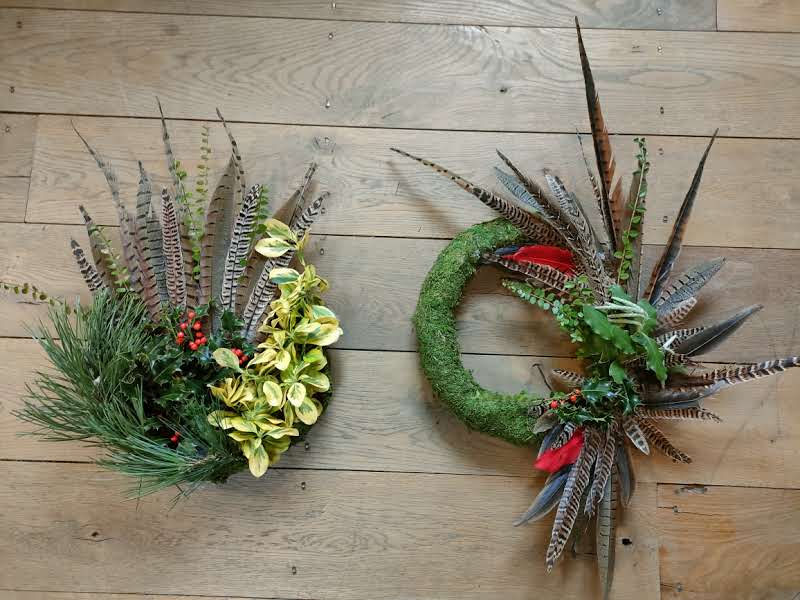
- Foliage – Go for a walk with your children and start collecting your foliage. My colleague raided her own garden and had all the beautiful greens that are pictured below. Pinecones, holly, pine needles, they will also make it smell amazing
- Feathers – Again, my colleague was able to get pheasant feathers from a local farmer, but they can be bought in a craft store
- Hot glue gun
- Glue sticks
- Ribbon – To be able to hang your masterpiece
- If you want to add anything else like baubles or little wooden figures, you can raid your current Christmas stash to see what you no longer use or head to the shops to source some extra decorations
- Scissors
- Imagination!!!
Method
Step 1
Start by laying out all of your foliage, feathers, decorations etc, so that you can see everything that you have. This will make it easier to select the right pieces.

Step 2
If you have a metal, polystyrene, wooden or plastic wreath ring you may need to cover it first so that you have a base to stick your foliage to. You can use moss, tinsel, or larger pieces of greenery. This will also hide the metal or plastic underneath
Step 3
Start laying out your foliage to see if the placement works. At this stage you don’t need to glue anything in, if you glue and then decide you are not happy it can be difficult to take if off without damaging the foliage. If you have a moss wreath you can push the stems in to hold them in place.
Step 4
Get the glue gun out. Before you take everything off, take a photograph to refer back to. Glue one layer at a time and keep playing with your layout and placement until you are happy with your wreath.
Step 5
Add your ribbon to the back. Find the central point and attached with wire, glue or string. Make sure it is secure so that it doesn’t fall off the door!
Step 5
Find the perfect spot to hang your creation and be proud of what you have made!
Door wreaths don’t need to just be plant based! Why not have a bit of fun like I have! I made this with absolutely no cost! I found toys that my children had had for years and not played with (two were from Mcdonalds Happy Meals!) and then raided my craft box for the rest. I took an old Christmas decoration apart for the tinsel and the donut was a brooch a friend made for me!
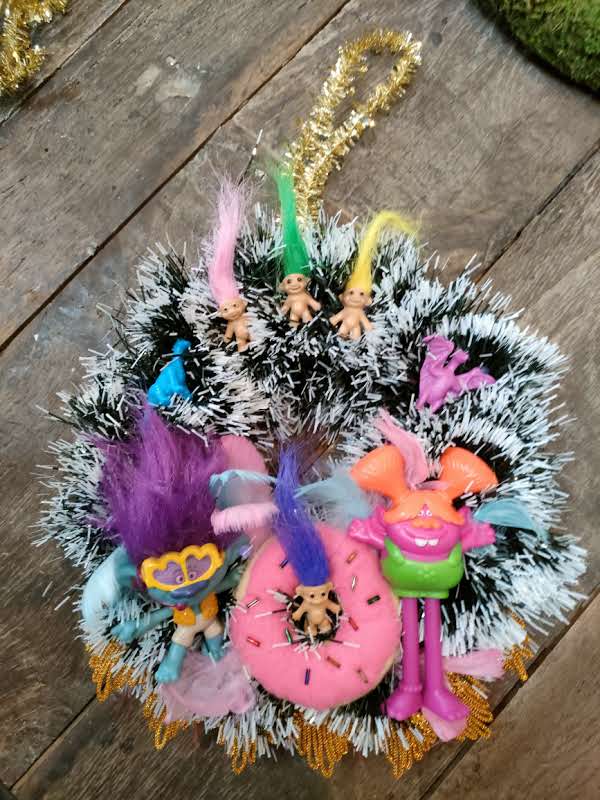
There is no rules except have fun and be creative! If you want more inspiration, take a look at Pinterest for ideas.
We would love to see your homemade creations! Don’t forget to tag us in your posts #rogerparryandpartners